
C# Source Generators - File New to NuGet
C# Source Generators are an exciting feature to allow automatic generation of code. Generators have been out of preview for several months, but getting started with them is still complex. This post will walk through the whole workflow from File New to NuGet, with an emphasis on Visual Studio tooling so that you can start developing your own generators without headache.
Screenshots and workflow were developed with Visual Studio 2019 16.10.2. I did some testing against the current previews 2019 16.11.0 Preview 2 and 2022 17.0.0 Preview 1.1 and did not find any substantial changes or improvements in issues discussed below.
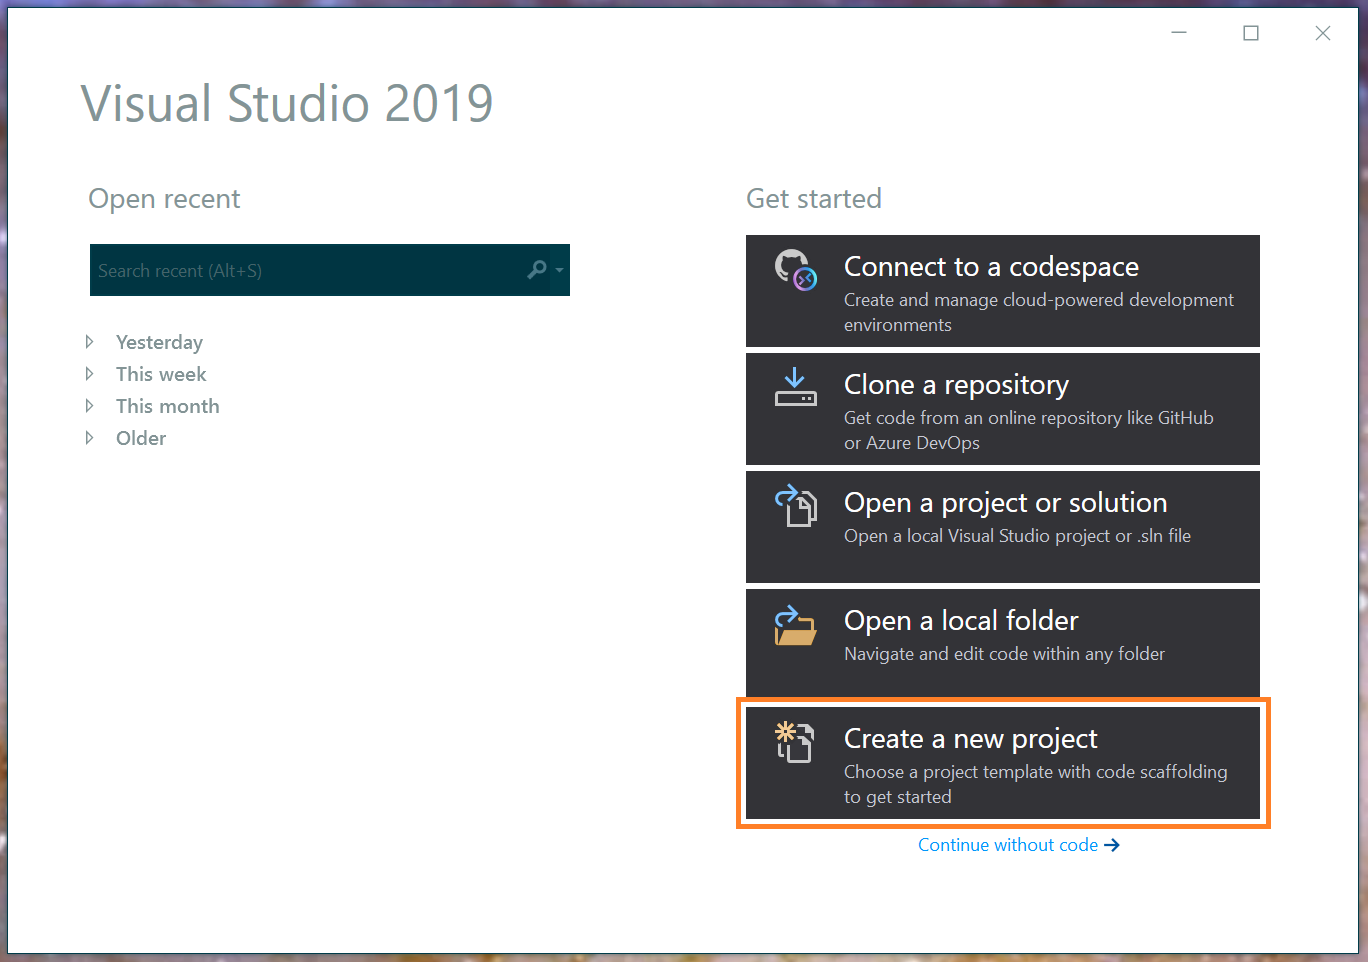
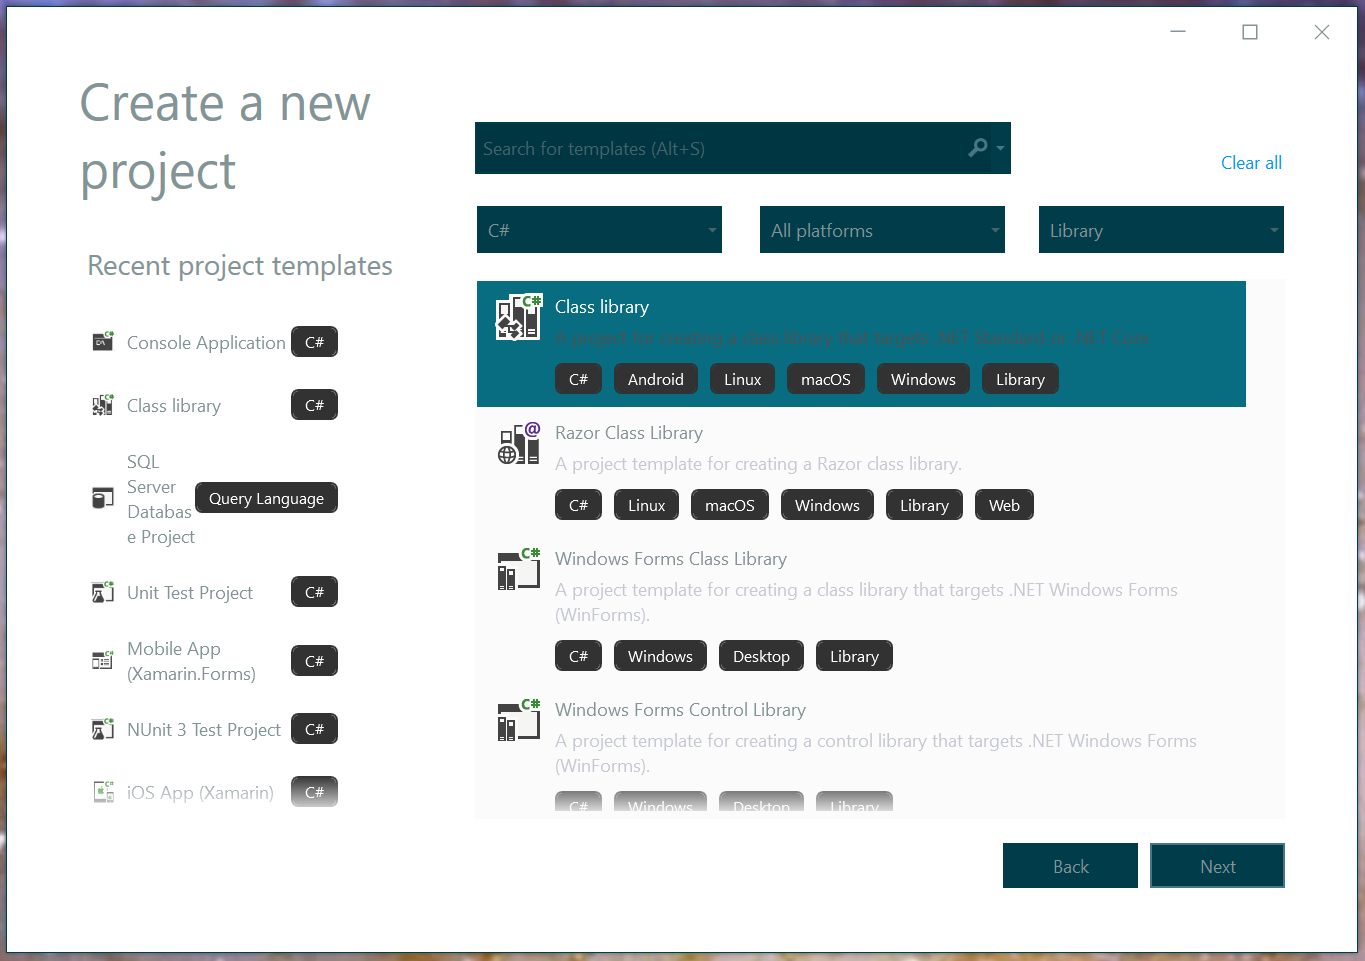
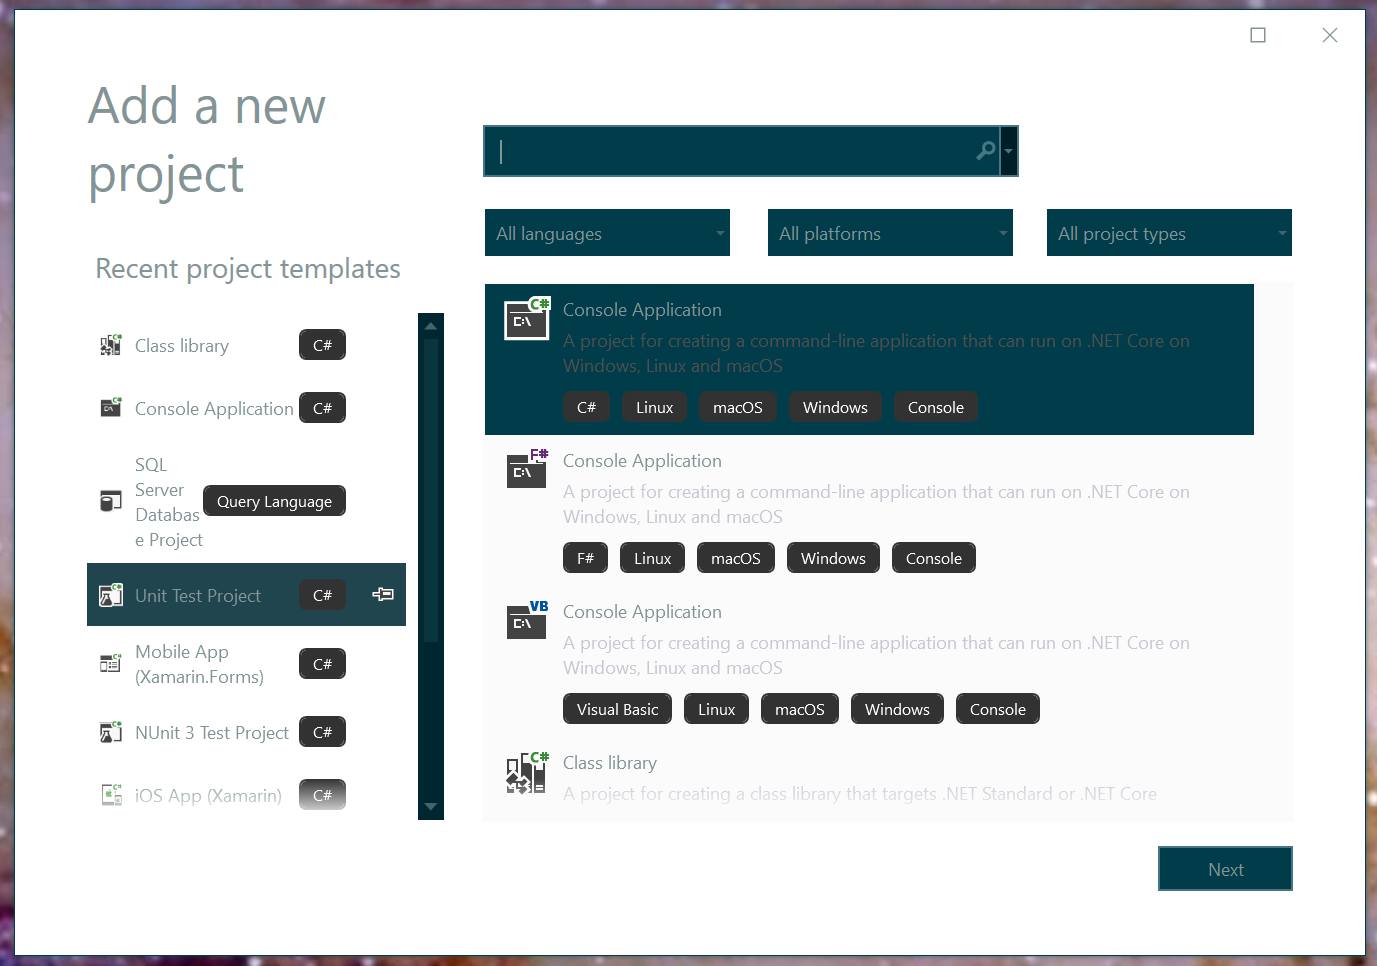
File New
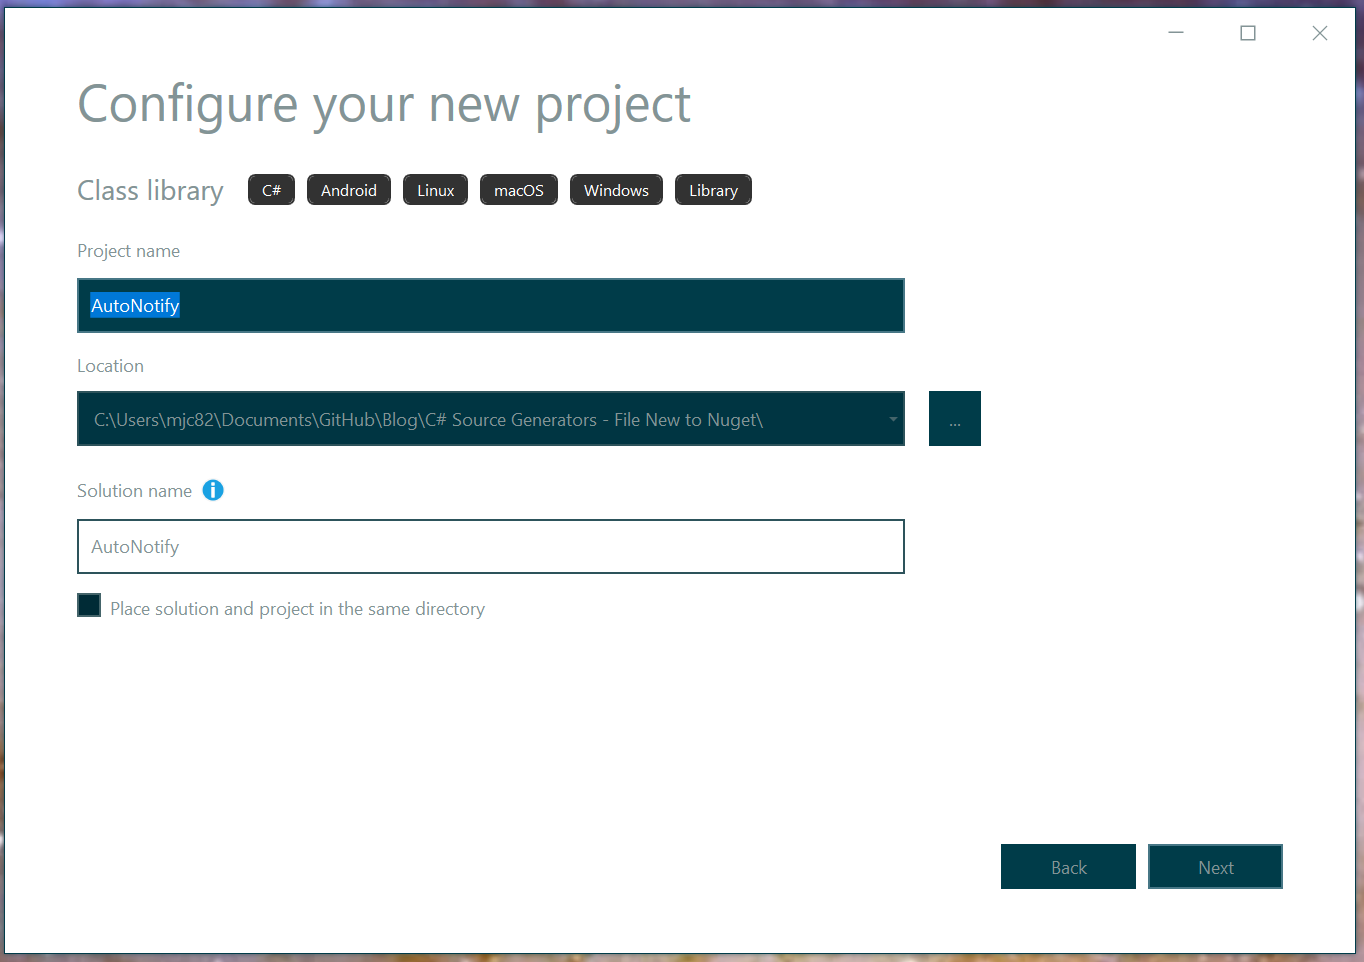
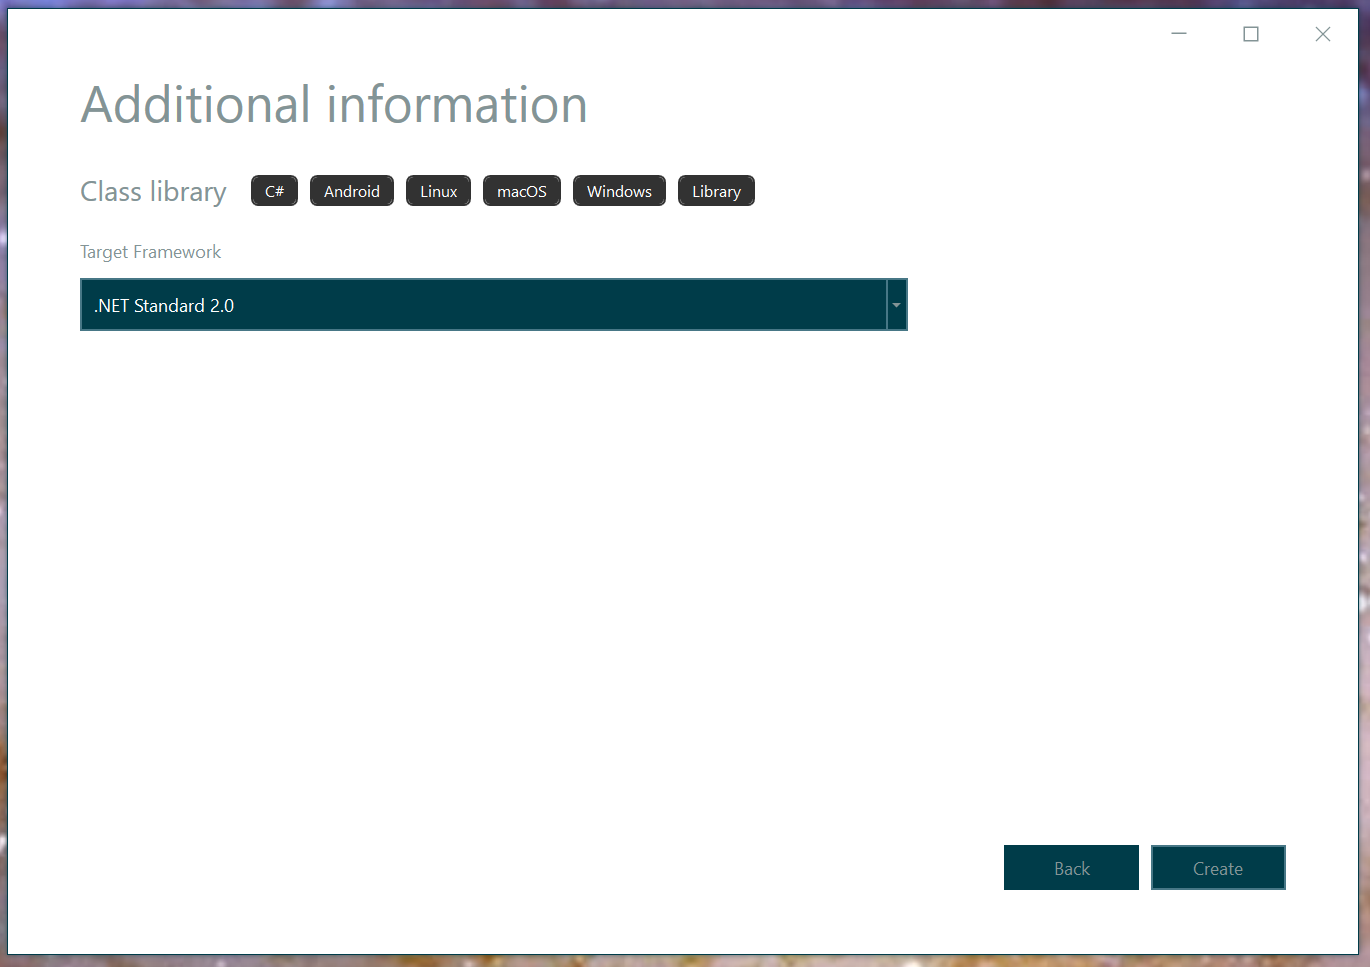
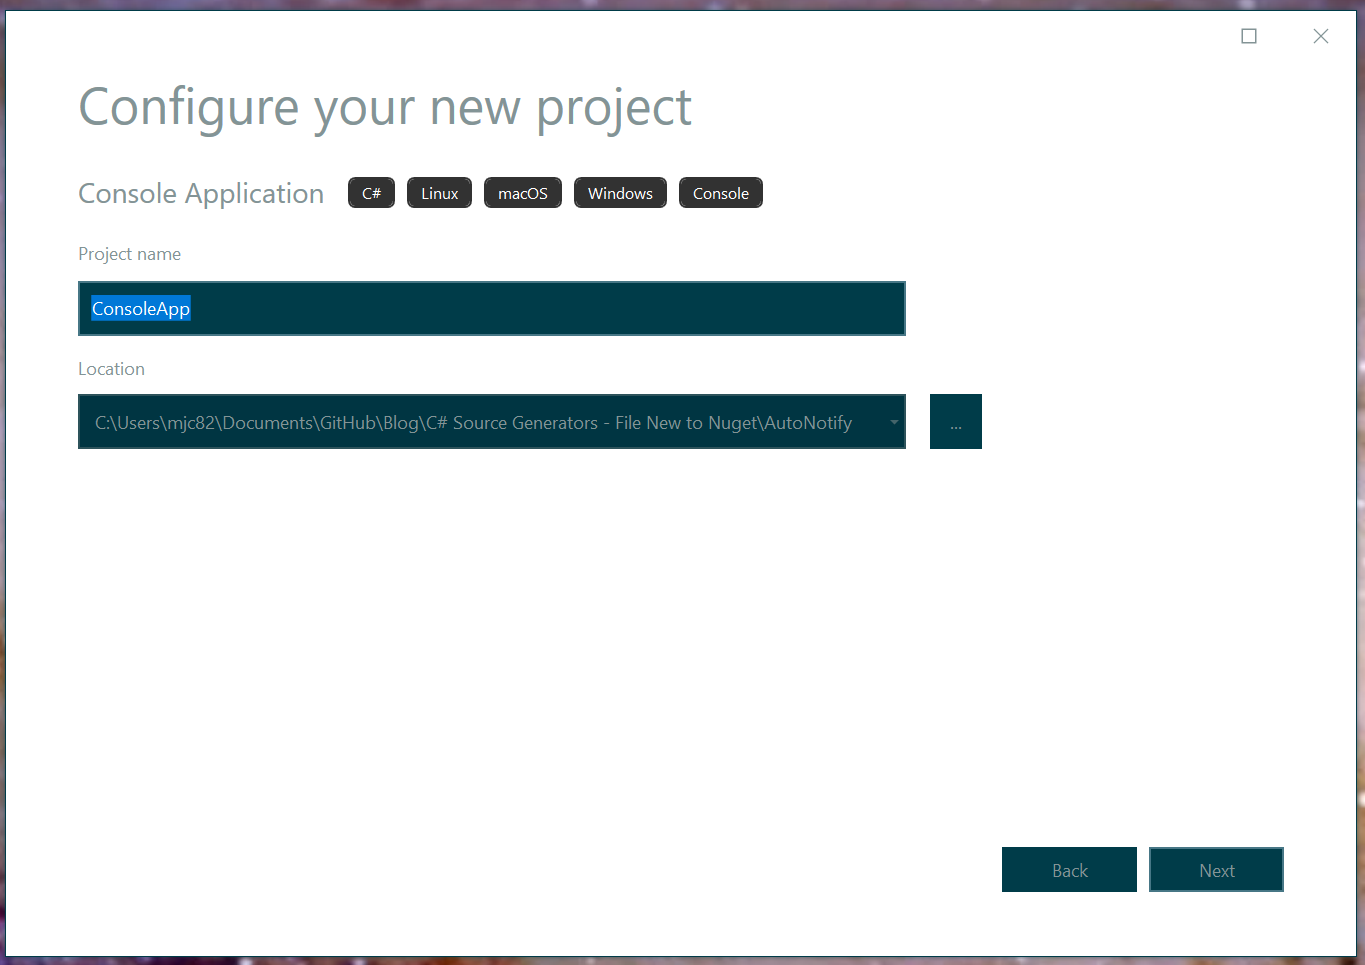
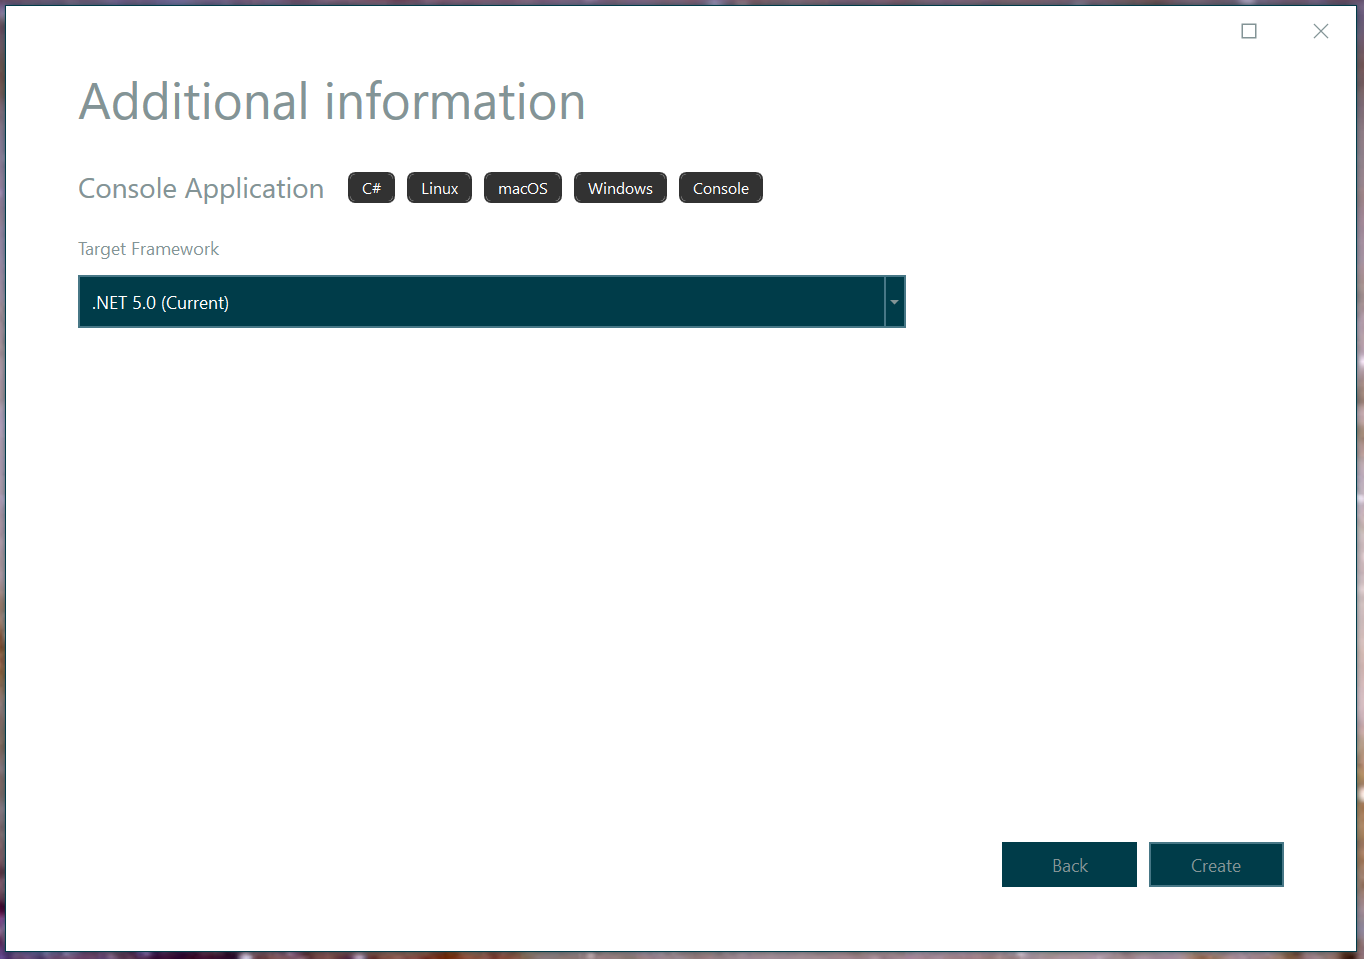
Initially we are going to create two projects AutoNotify which will contain our generator and ConsoleApp which we will use to test that the generator is working properly.
Go ahead and delete the Class1.cs file from the library.
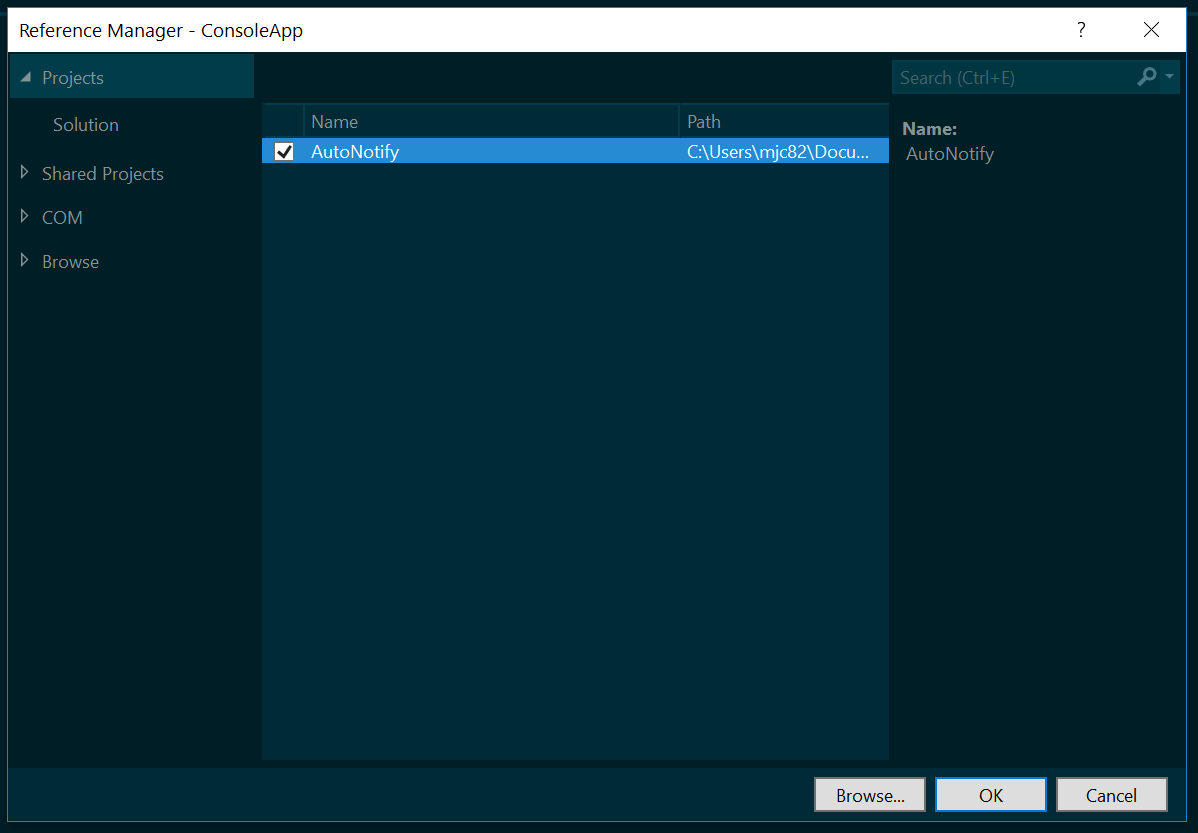
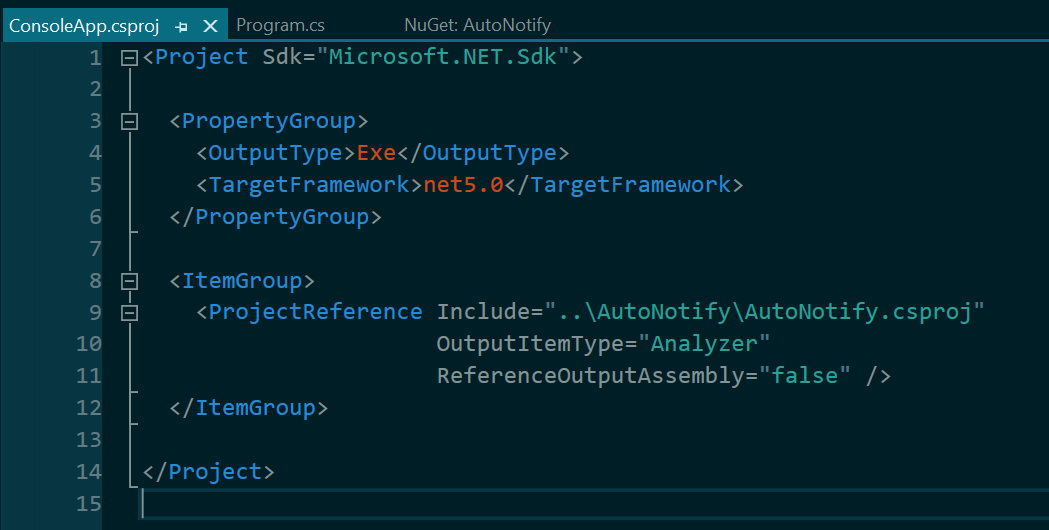
Our project reference isn’t a normal reference. We need to tell Visual Studio that AutoNotify is an Analyzer (and therefore needs to run as part of Visual Studio’s tooling) and also that we can’t reference the assembly in our code. Because the Analyzer is just a piece of tooling, it won’t be shipped with our application. We will be using the code it generates, but will not have a direct dependency on it within our code. Note, you do NOT need to do this when you consume a NuGet package with a generator. This applies only when developing the generator.
Setup the Source Generator
In order to start doing source generation we need two things, some NuGet packages and one or more generator classes.
First, right click on the AutoNotify property and choose ‘Manage NuGet Packages’. Browse for and install these two packages:
- Microsoft.CodeAnalysis.Analyzers
- Microsoft.CodeAnalysis.CSharp.Workspaces
Now, right click on the AutoNotify click Add -> Class. Name the class AutoNotifyGenerator. To keep this tutorial relatively brief, we are going to use the code AutoNotifyGenerator.cs from Source Generator Samples on GitHub.
Briefly, this generator does two things. First, it always adds AutoNotifyAttribute to our project. Second, it looks for any field decorated with that attribute (which must be in a partial class) and generates a public property for that field and implements INotifyPropertyChanged.
Time for Some Magic
Just to make sure everyone is on the same page here.
- Click ‘Build’ -> ‘Build Solution’.
- Restart Visual Studio (we will discuss why in a later section).
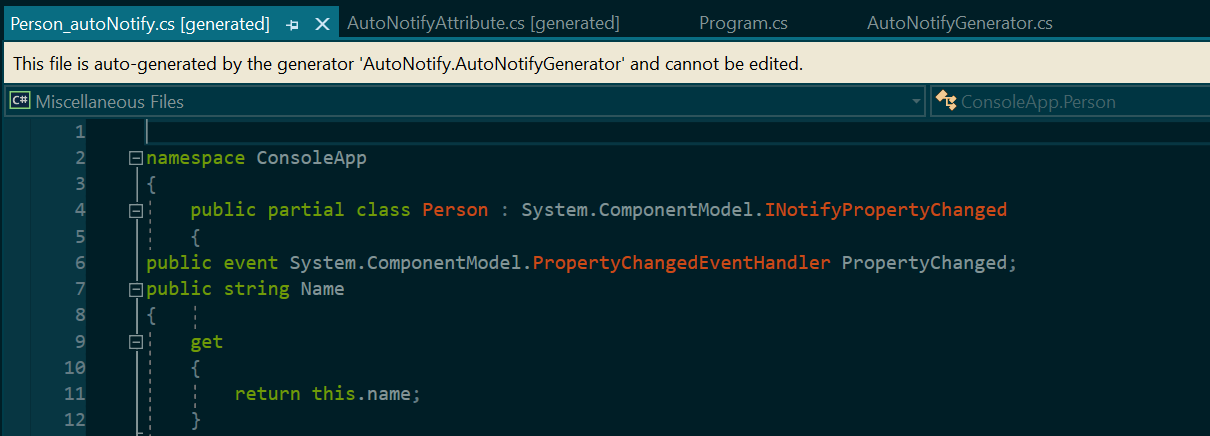
If everything worked, you should be able to see in the ConsoleApp dependencies that we now have our generator showing up as an analyzer, and below that we should see the AutoNotifyAttribute.cs.
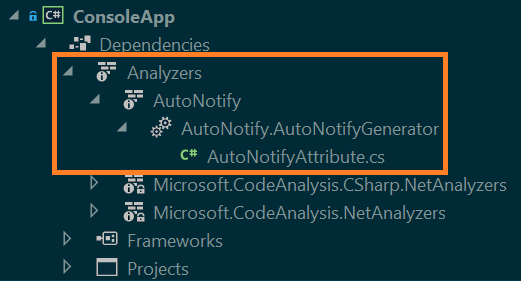
If we double click the AutoNotifyAttribute.cs we can see the output code, including warnings from Visual Studio that this file isn’t editable.

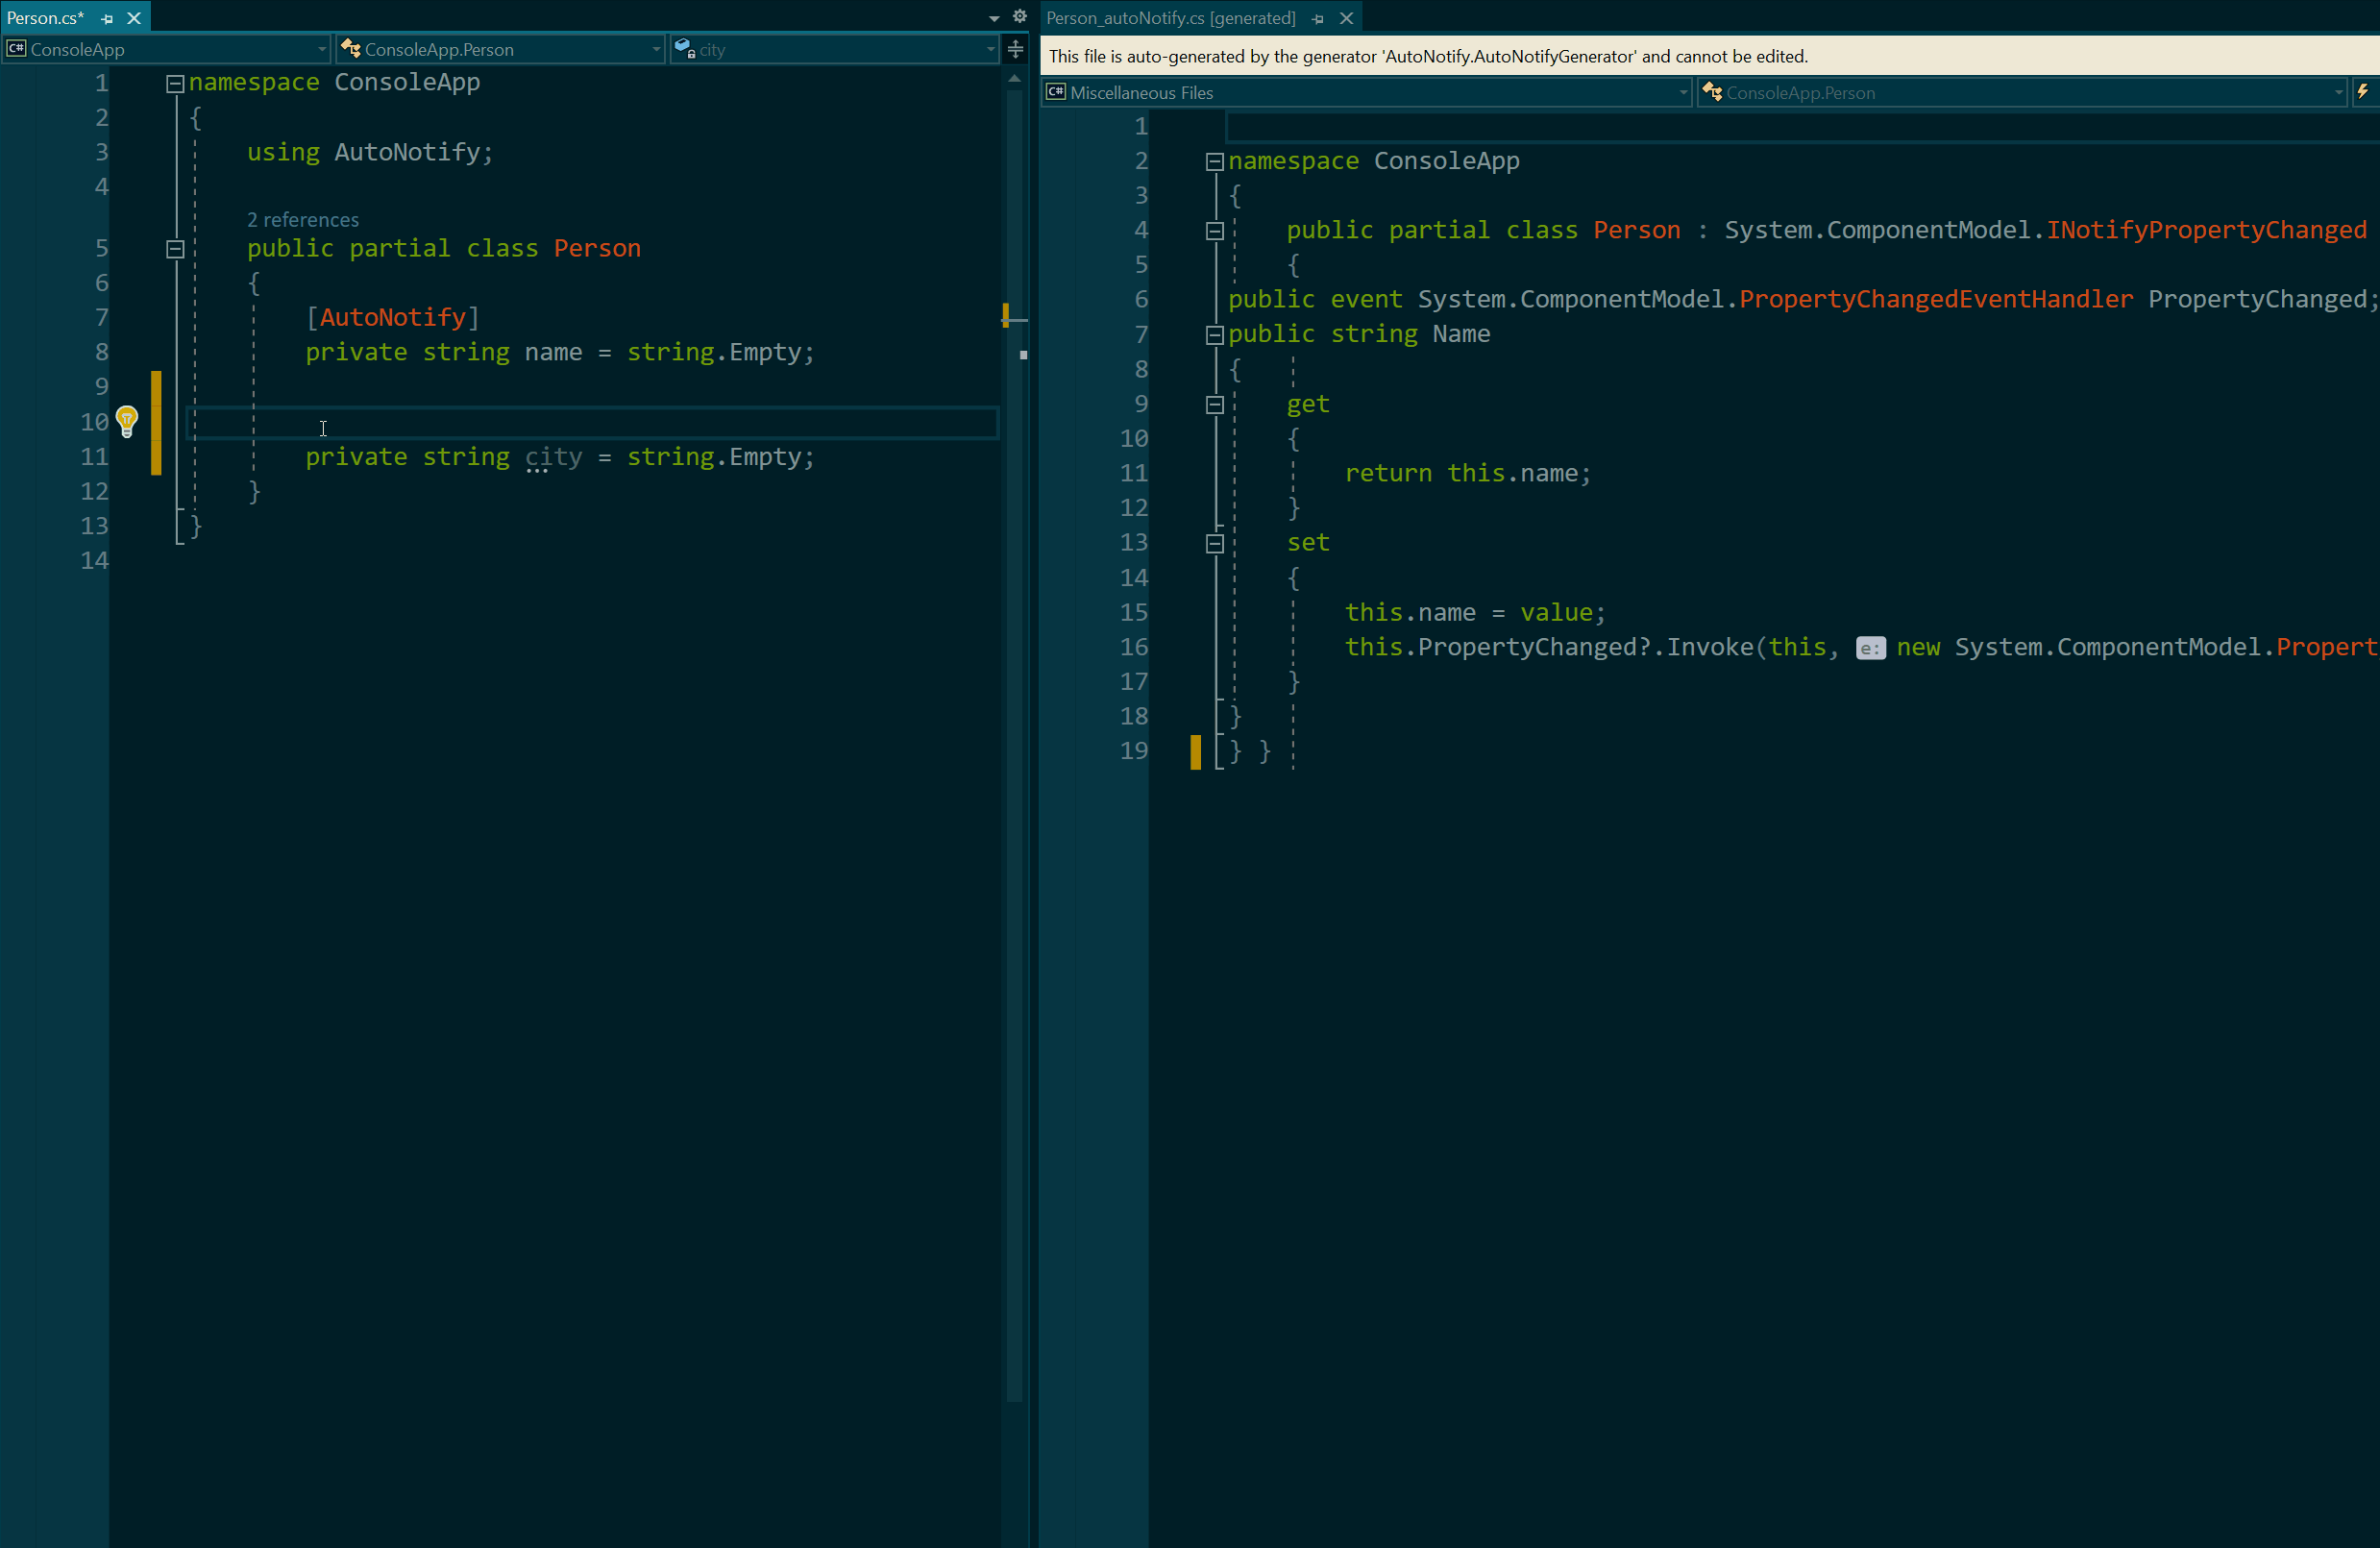
At this point, we can make use of our generator. By adding a new class Person. There are a few things to point out. First, this is a partial class so that the generator can add code to the class in another file. Second, the using AutoNotify is referencing the namespace added to ConsoleApp by AutoNotifyAttribute.cs, not the namespace within our generator project.
1
2
3
4
5
6
7
8
9
10
namespace ConsoleApp
{
    using AutoNotify;

    public partial class Person
    {
        [AutoNotify]
        private string name = string.Empty;
    }
}
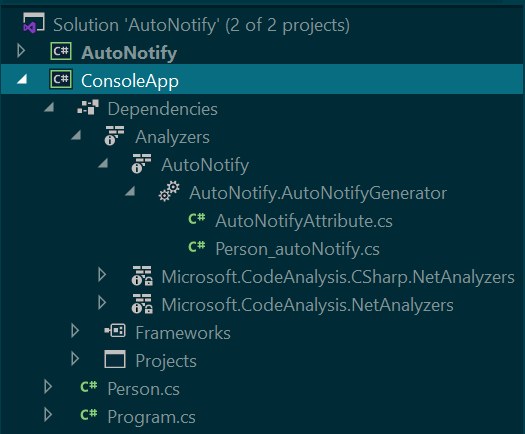
As soon as we add the Person class we will see the new Person_autoNotify.cs is created by the generator.
At this point, I recommend you open your Person.cs code side by side with Person_autoNotify.cs and do a little experimentation. You should see live updates to the generated code. Just as you see them, the new properties are becoming available and can be used anywhere in your code.
Updating the Generator - Getting Out of Sync
Let’s make a change to the generator so that we get console output when the property changes. This will make testing the added functionality easier and it will let us look at why generator development involves a lot of Visual Studio restarts.
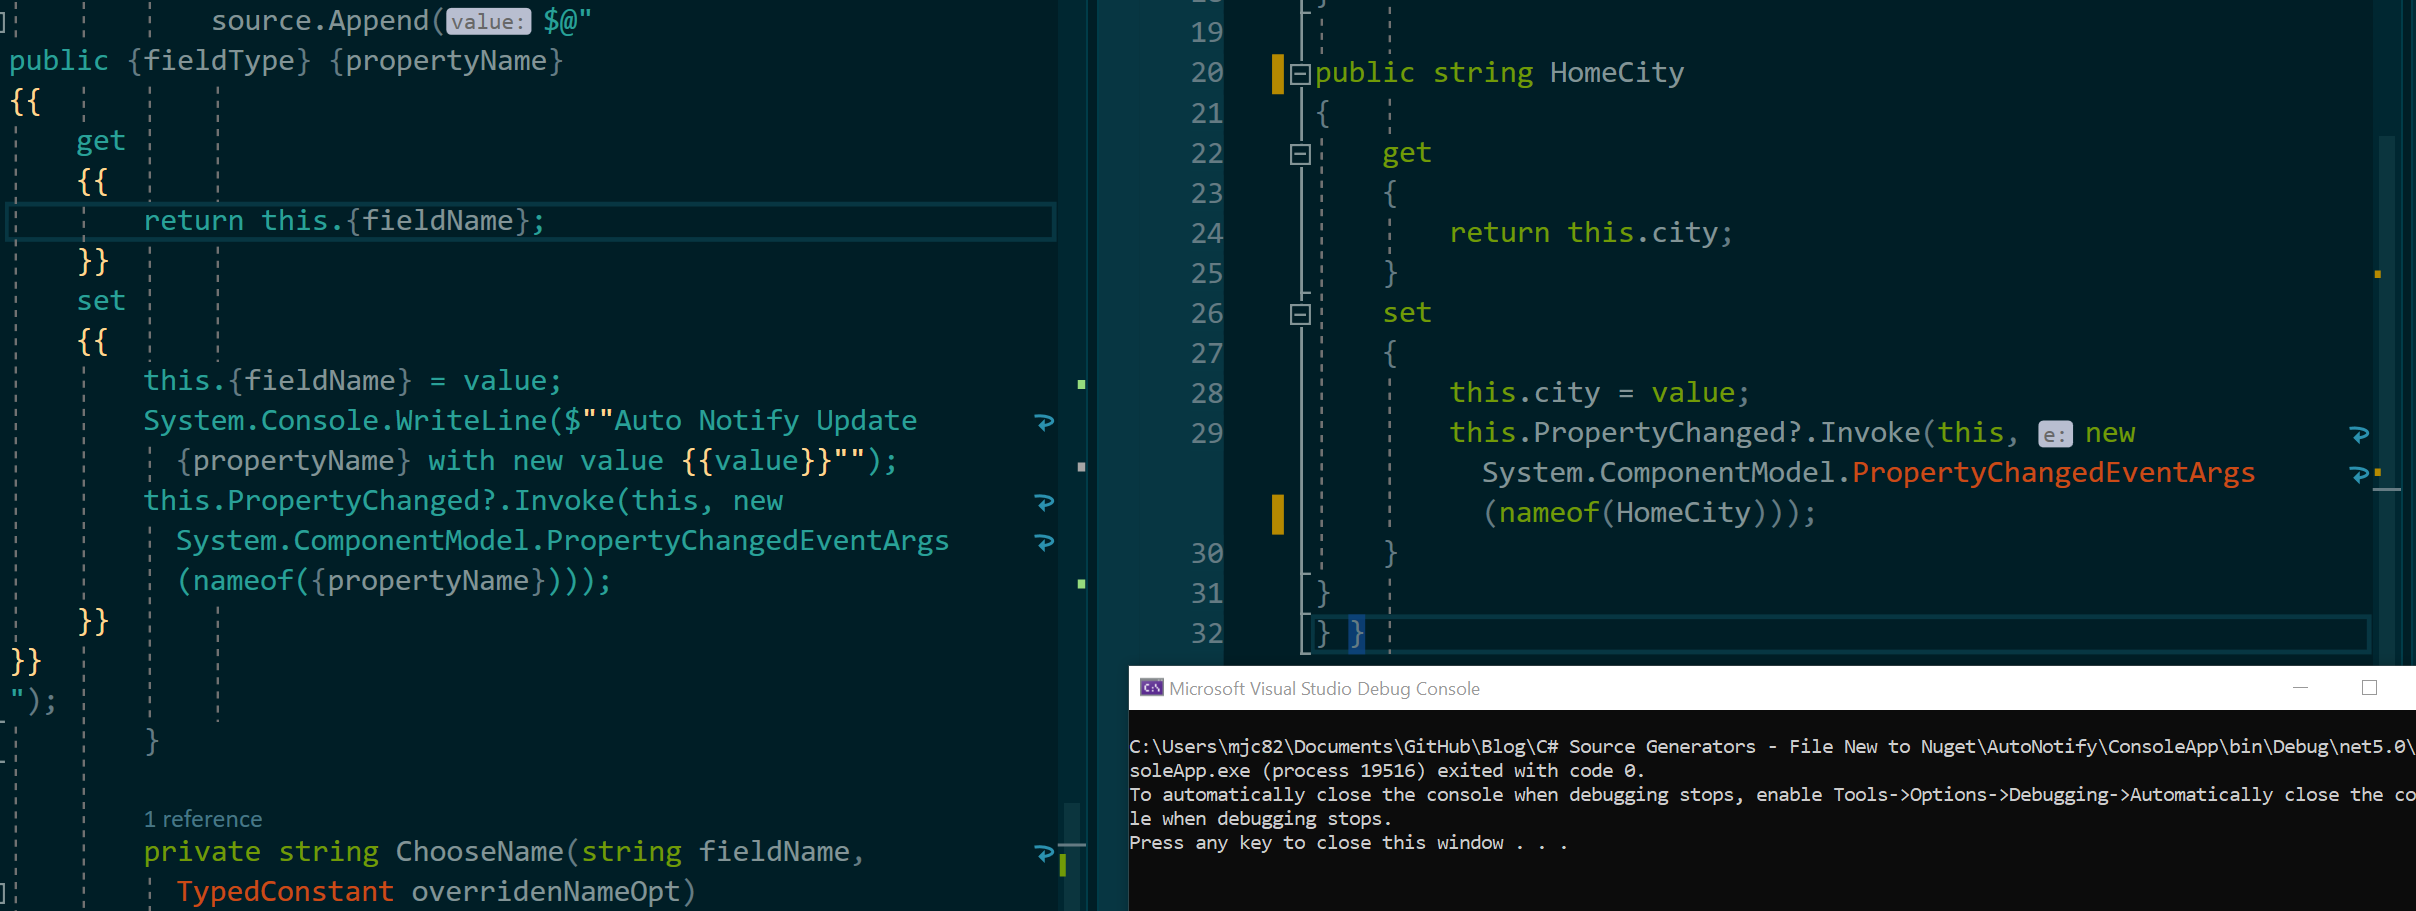
First, let’s get Person.cs and Program.cs setup as shown below.
1
2
3
4
5
6
7
8
    public partial class Person
    {
        [AutoNotify]
        private string name = string.Empty;

        [AutoNotify(PropertyName = "HomeCity")]
        private string city = string.Empty;
    }
1
2
3
4
5
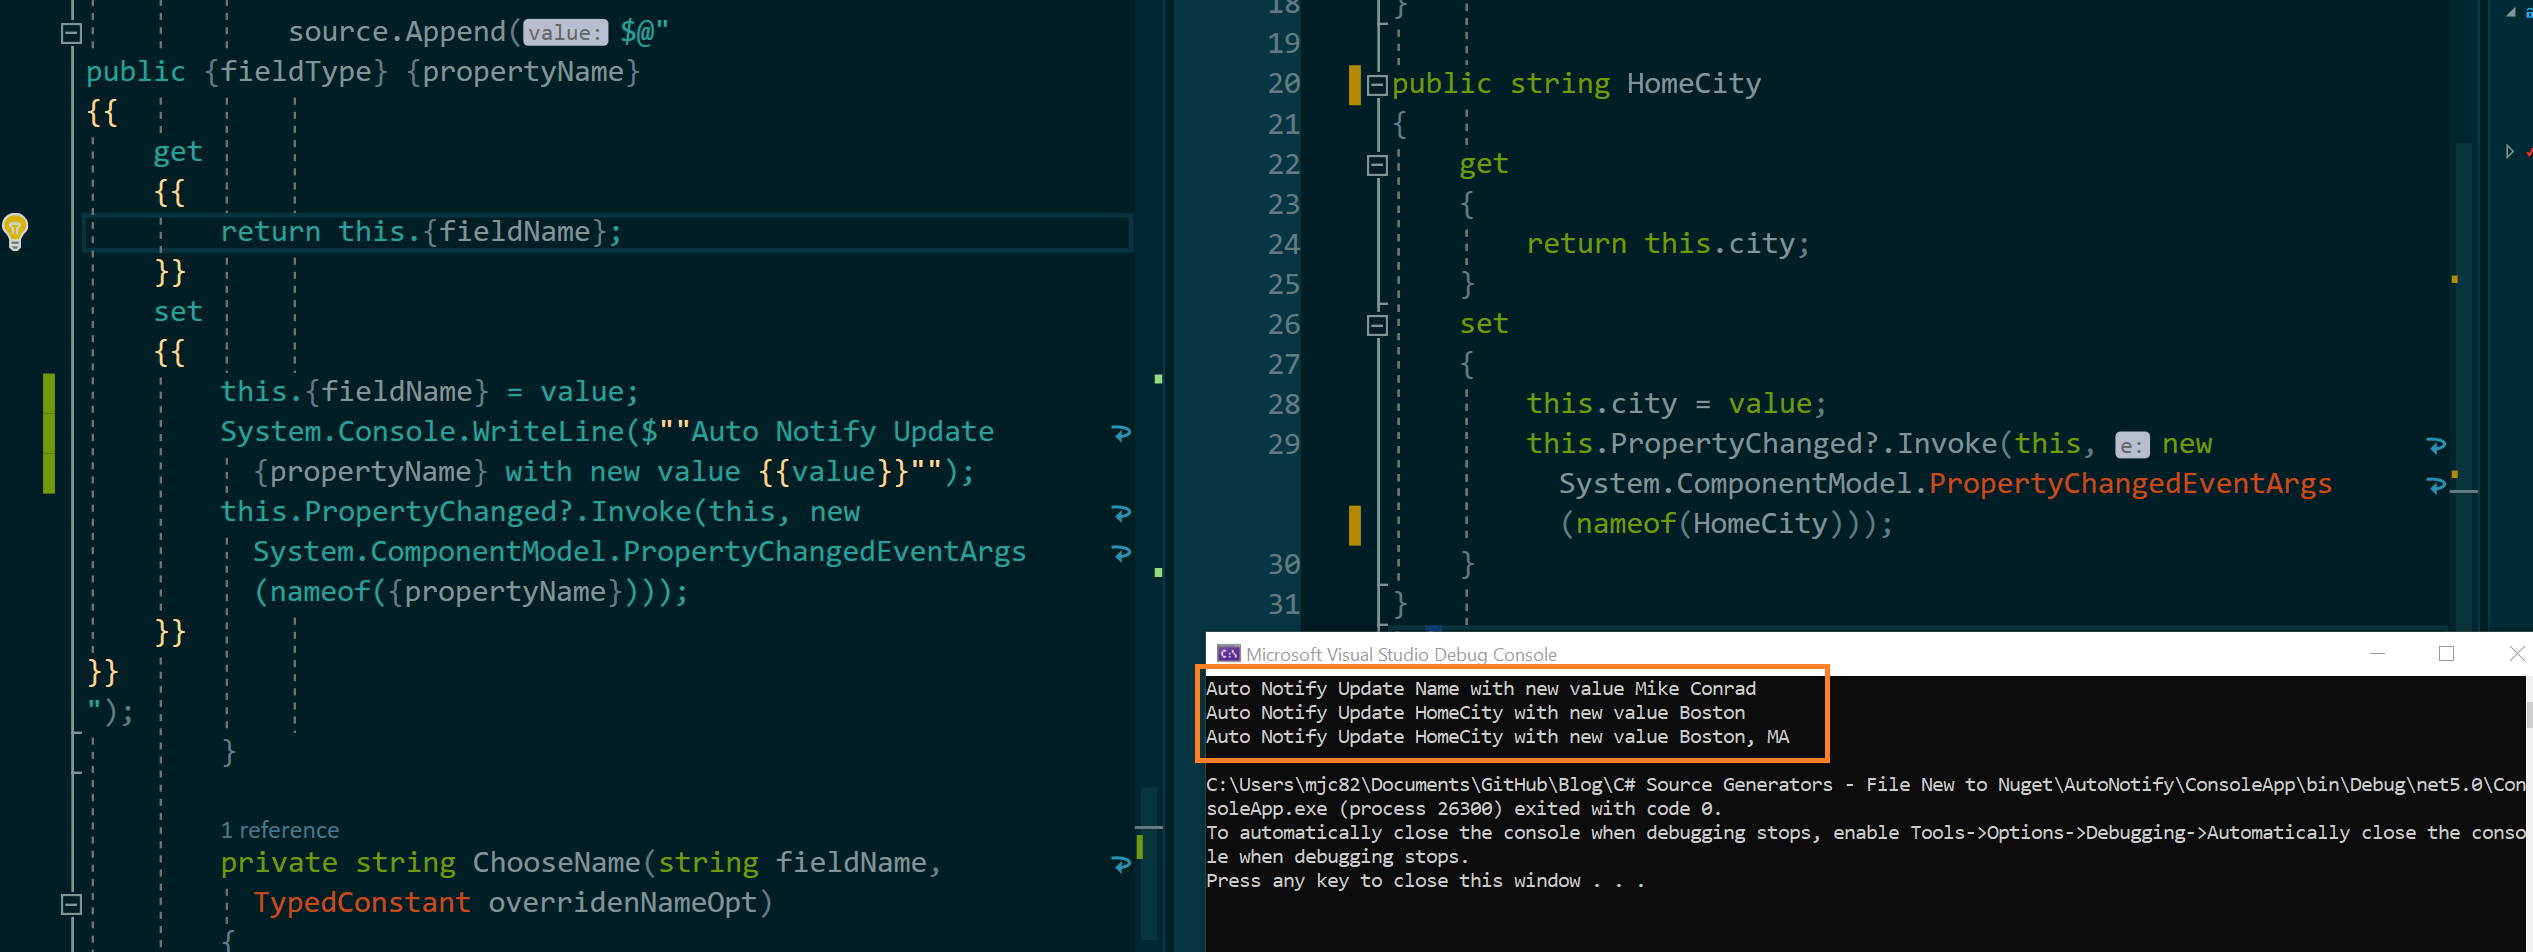
private static void Main(string[] args)
{
var p = new Person { Name = "Mike Conrad", HomeCity = "Boston" };
p.HomeCity = "Boston, MA";
}
Right now, if we run the program, we won’t get any console output. So go ahead and add the Console.WriteLine call below.
1
2
3
4
        // This should be at line 138 in AutoNotifyGenerator.cs
        this.{fieldName} = value;
        System.Console.WriteLine($""Auto Notify Update {propertyName} with new value "");
        this.PropertyChanged?.Invoke(this, new System.ComponentModel.PropertyChangedEventArgs(nameof({propertyName})));
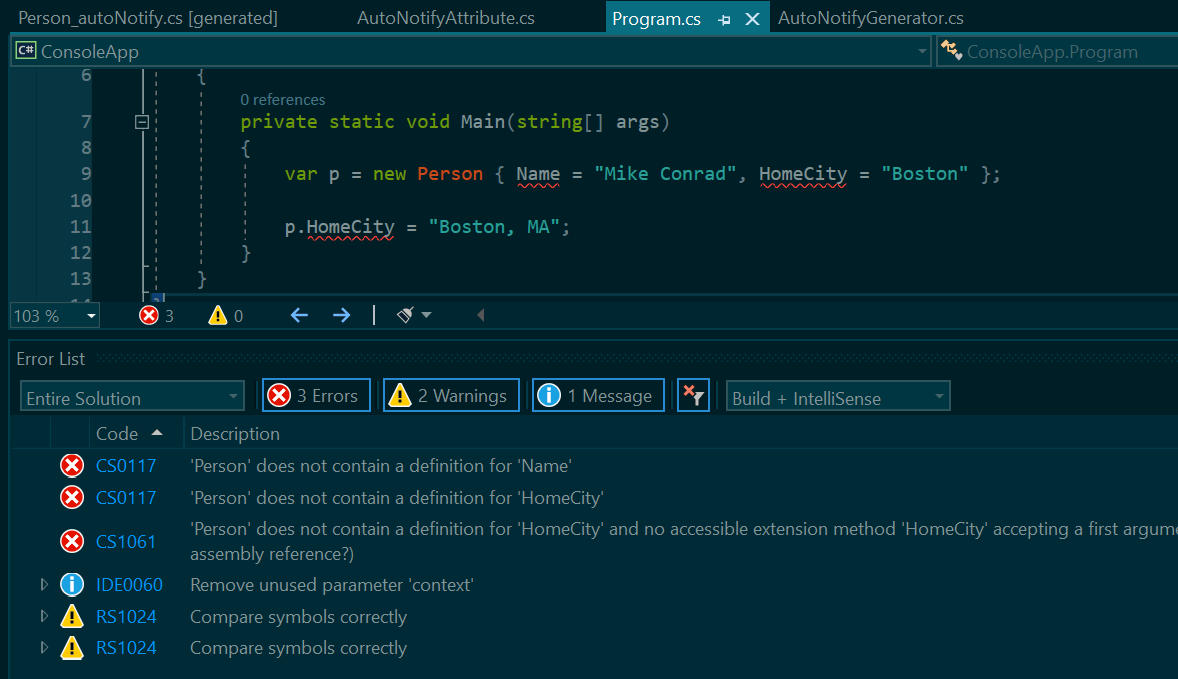
Now that we added the console output, take a look at Person_autoNotify.cs and you will see it hasn’t changed. And if we run the ConsoleApp, we don’t get any console output.
This, from what I have seen, is the biggest limitation in Visual Studio’s tooling around generators.
What is Out of Sync?
When Visual Studio loads a project with an analyzer, it is using the generator assembly which is available at the time that it loads. This is the version that Roslyn is using to generate code you can see under Dependencies -> Analyzers. And that is the code which powers what is available to you during design time for IntelliSense.
So, when we change our generator code and rebuild the generator, Visual Studio can’t tell that the original generator assembly and the current one are different. Something similar is going on for the ConsoleApp project so it isn’t building with the correct version of the analyzer. You can learn more and check on progress towards fixing this issue here.
Out of Sync - No API Changes
When a change to a generator does not alter the API of the code it generates, we can work around this to a degree. The change we made above adding console output is a good example because we changed what happens in the setter of our generated property, but didn’t change the name of the generated property.
There is a little bit of a workaround you can do here. Even though this isn’t a perfect fix, I recommend you do this because of the benefits it provides when there are API changes. This will ensure ConsoleApp always uses the right version of the generator when it is built.
- Right click
AutoNotify-> Properties -> Build Events - Add
dotnet clean "$(SolutionDir)\ConsoleApp\ConsoleApp.csproj"to the Pre-build event command line.
If you DO need to see the changes in the generated code, you still need to restart. So, I find this makes iterative development a little less tedious, but not that much.
Out of Sync - API Changes
If we need to change the API of our generated code or if we want to alter the compiler warnings or errors output by our generator, then we should build the generator and then do a full restart.
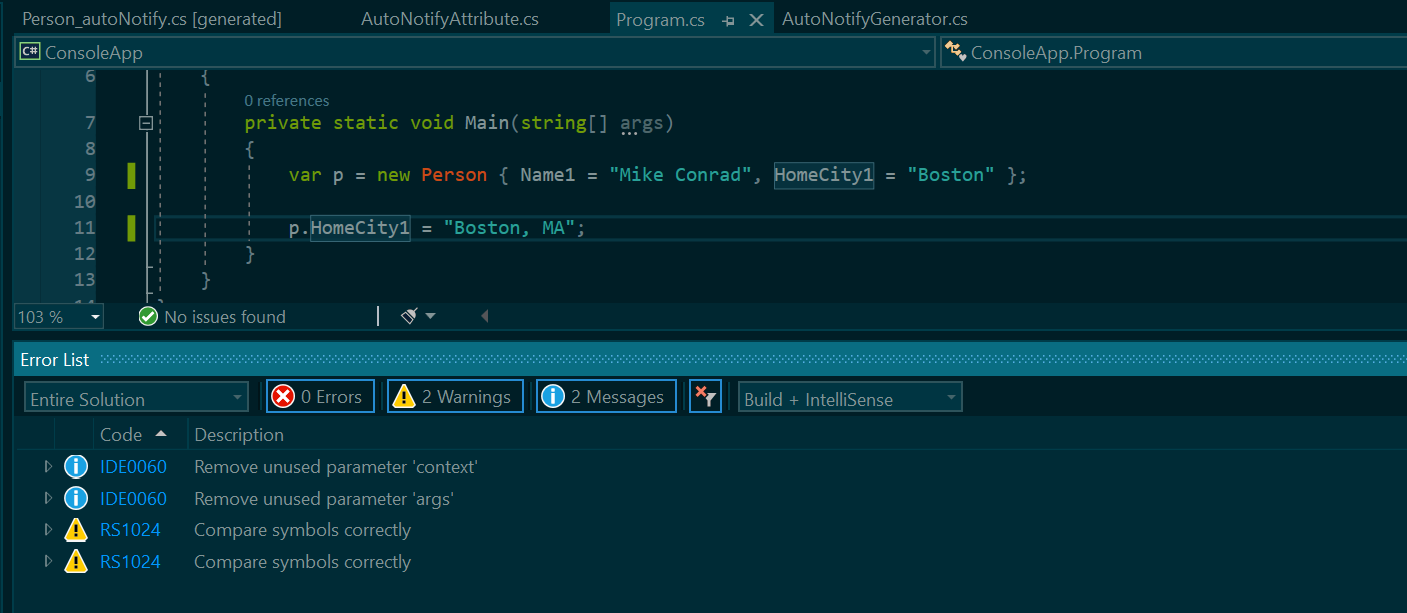
As an example, if we wanted to add “1” as a suffix to every property name (for some reason):
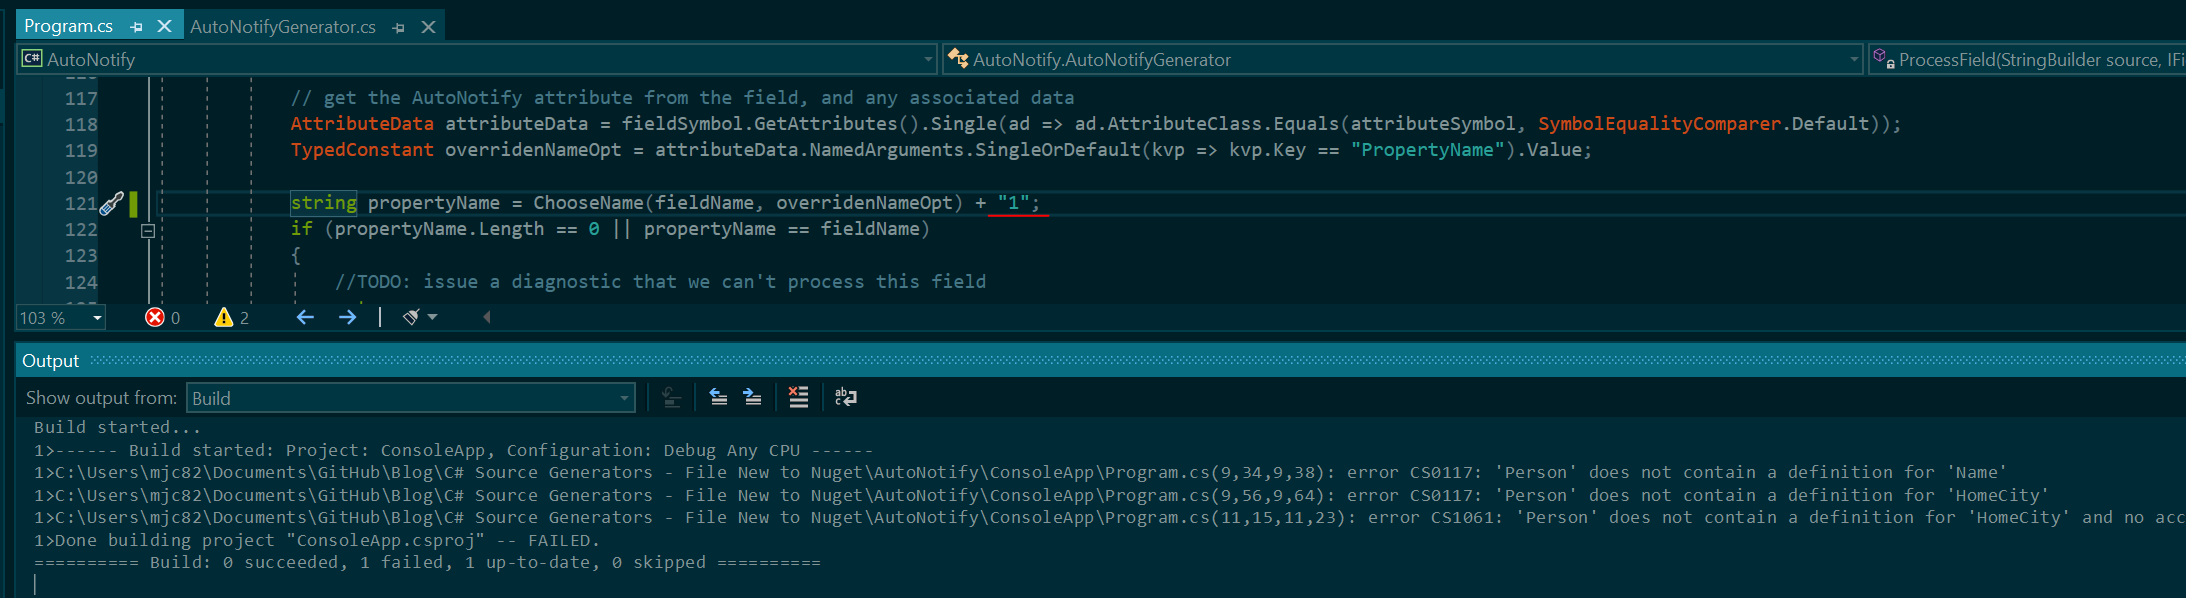
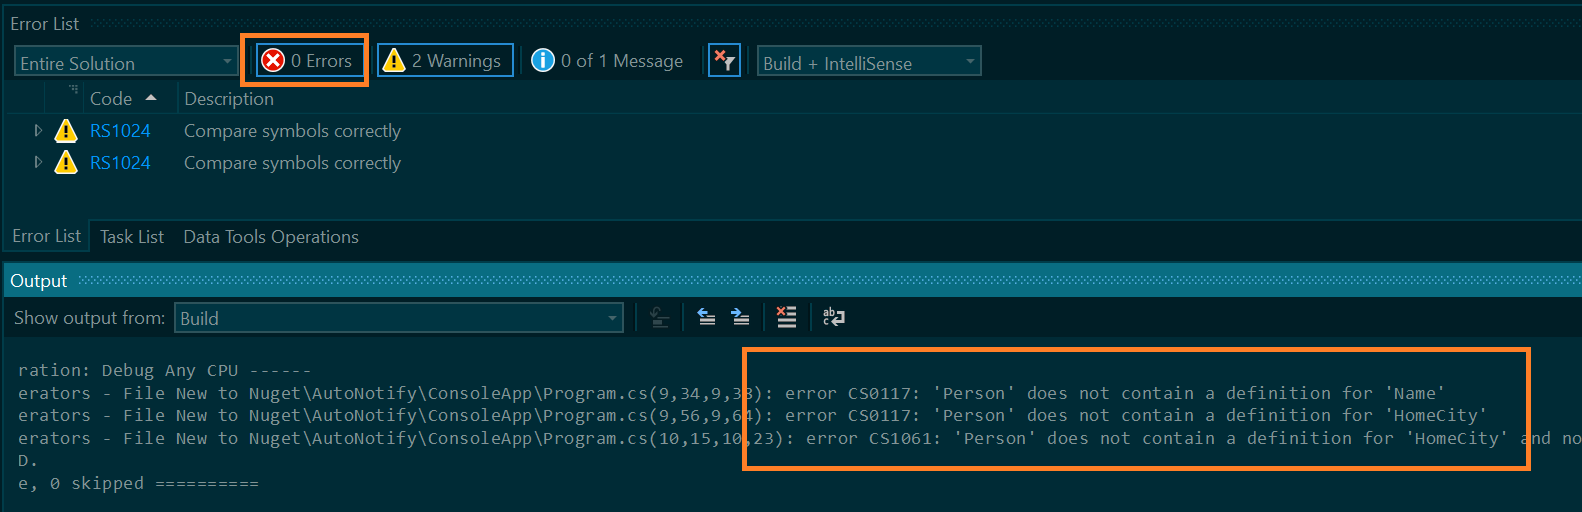
When we build, we will get a build failure. This is only happening because of the pre-build clean step added above. Without the clean step we wouldn’t have gotten the build failure, which I prefer as it is a reminder we have done something that necessitates a restart.
After we build the generator and restart visual studio, everything is back in sync.
Unfortunately, you are going to need to do this Build and restart pretty often at the moment.
Debugging
Because our generator is running during compile time instead of when our app runs, we can’t just set a breakpoint and step through the code generation.
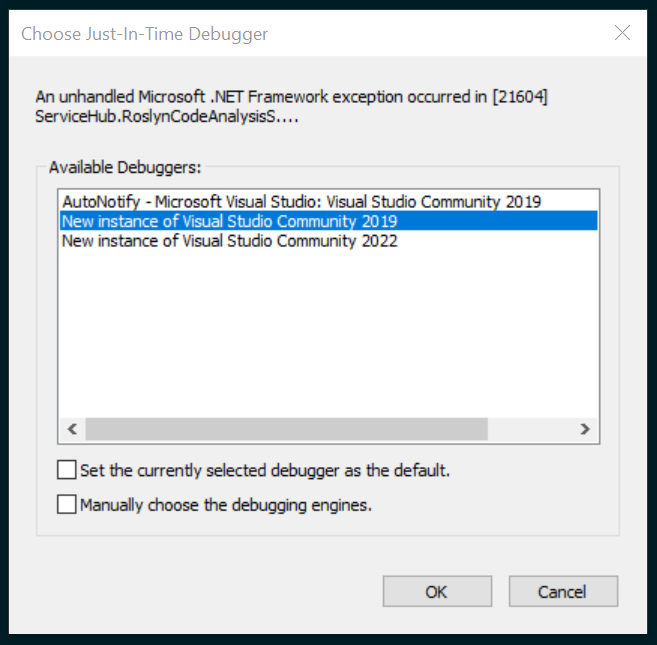
What we can do is add a compiler directive which will launch a debugger that is attached to our generator. With this in place, we can add breakpoints wherever we need. This is helpful when you want to figure out why you aren’t generating the output you expect, but more importantly, it’s really the only way to get a look at what is happening if your generator crashes.
1
2
3
4
5
6
7
8
9
10
11
12
        public void Initialize(GeneratorInitializationContext context)
        {
#if DEBUG
            if (!Debugger.IsAttached)
            {
                Debugger.Launch();
            }
#endif

            // Register a syntax receiver that will be created for each generation pass
            context.RegisterForSyntaxNotifications(() => new SyntaxReceiver());
        }
It isn’t the topic of this post, but if there are issues your generator can run into which the developer using the generator needs to address, these can be communicated through compiler warnings or errors emitted by your generator. Regular users won’t be able to debug your generator so you need to handle errors and communicate them in this way. It is very important that your generator doesn’t crash the compilation, because your users won’t have any way to tell what’s happening.
NuGet
Finally, we want to get our generator packaged so it can be used in other projects. First, right click on AutoNotify -> Properties -> Package.
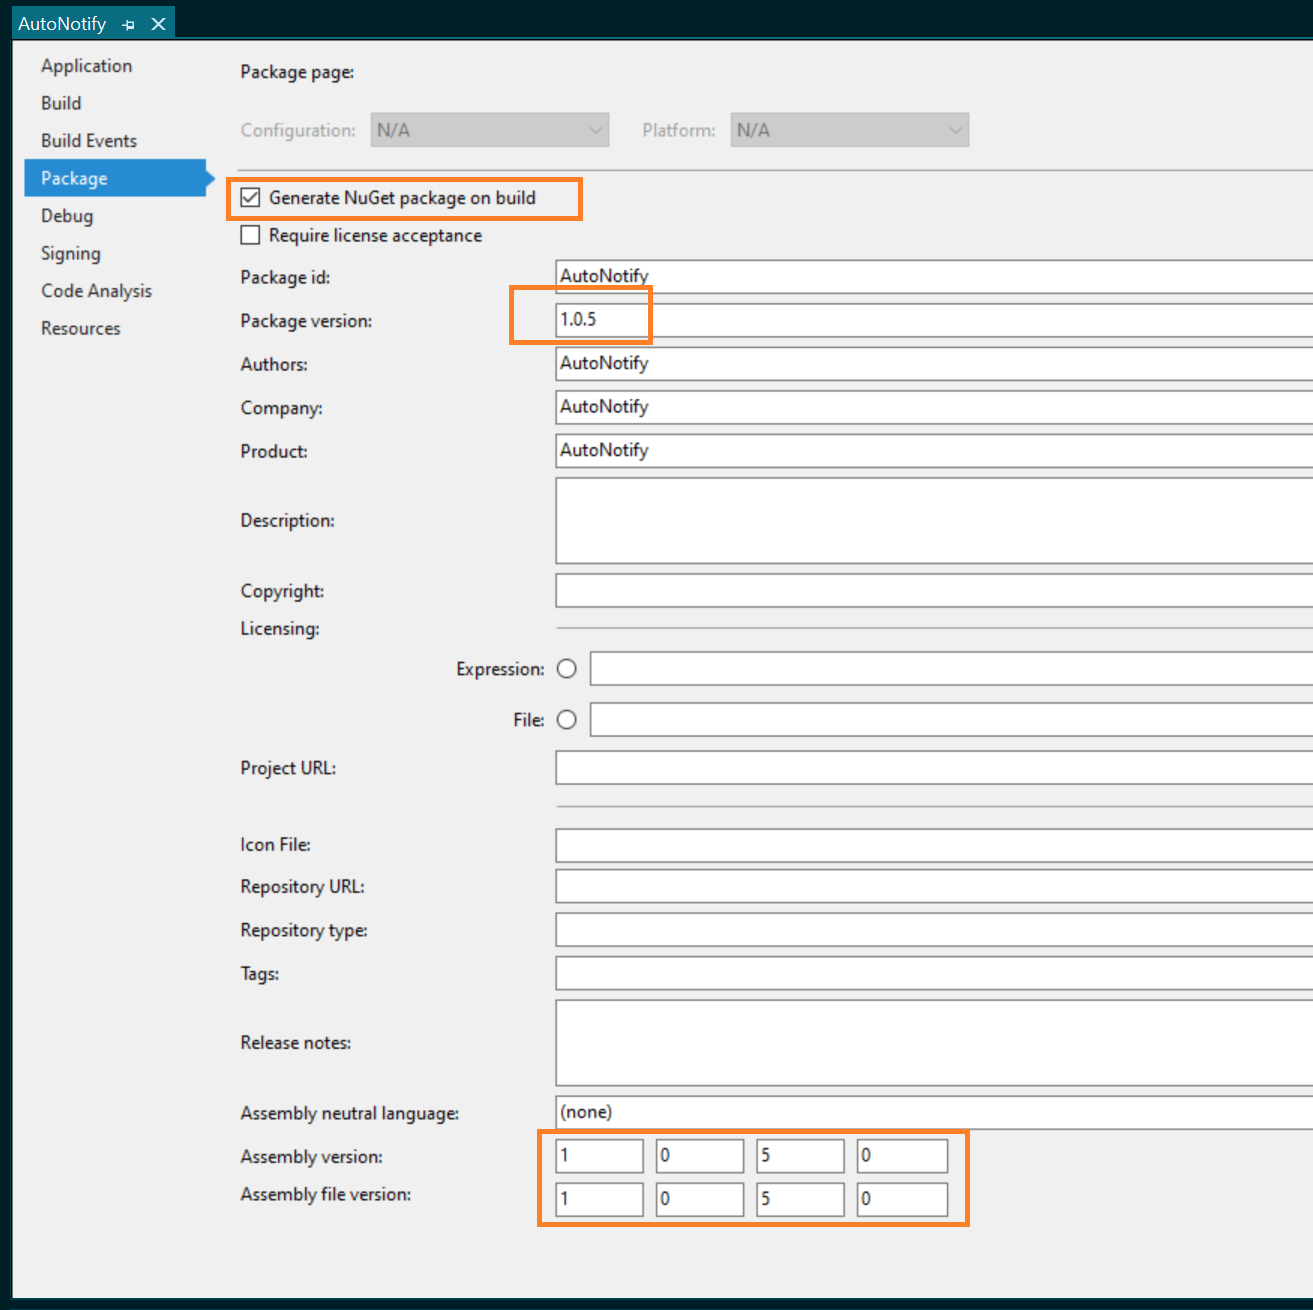
If you want, you can check off Generate NuGet on build, so it generates every build. Importantly, for every version you want to actually publish and use, you need to update the version numbers. This matters even for internal development, because if the version numbers don’t change, then you are right back having the issue above where Visual Studio might run the wrong version without knowing.
Once we build, our new NuGet package is in the AutoNotify\bin\Debug\ folder. You may be aware, you can change the file extension of a .nupkg to .zip which will allow you to browse the contents. If you do this, you should see our generator is in the location analyzers\dotnet\cs\AutoNotify.dll. This analyzers folder is part of why, when we use this NuGet package directly, we don’t need to do anything special to get the references to work.
For simplicity, we will use a local NuGet feed which I have located in c:\nuget\. I also have a copy of the nuget.exe saved in that location. To publish to the local feed we can open the path to AutoNotify\bin\Debug\ in powershell and run the command c:\nuget\nuget.exe add AutoNotify.1.0.5.nupkg -source c:\nuget\packages\ (making sure you use the right version number).

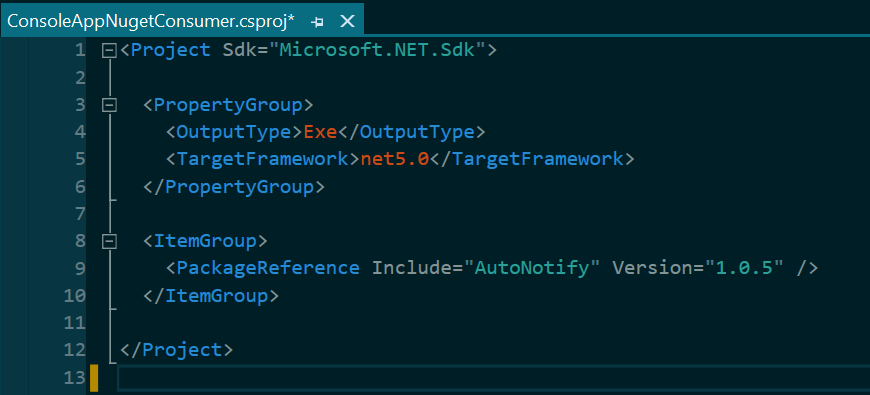
Now that this is published, we can add another ConsoleApp to this solution or a different one, called ConsoleAppNugetConsumer. Now we can add this NuGet package to our app.

If this is your first time setting up a local NuGet feed. Click the gear icon on the package manager page and setup a source pointing to that feed.
As discussed above, now that we are using this generator through a NuGet package, our project file doesn’t contain anything unusual in the PackageReference. So, our users won’t need to do anything complex to get the benefit of this generator.
You can now add the Person.cs partial class above, and you will see the generator is producing code for you as expected.
Summary
There is plenty more to learn on how to actually write generator code, but I hope this will give you a footing to get started experimenting, despite sub-optimal tooling. Keep in mind:
- You reference a generator differently during development than you do when using it from NuGet.
- You will need to restart Visual Studio often when changing the generator code.
- Adding a pre-build clean setup can help remind you when you have made a change that absolutely requires a restart.
- You can debug by adding compiler directives.
- Once published to NuGet, your users will not have to deal with these issues.
Leave a Comment
Your email address will not be published. Required fields are marked *